 |
|
|
|
#1
|
|||
|
|||
|
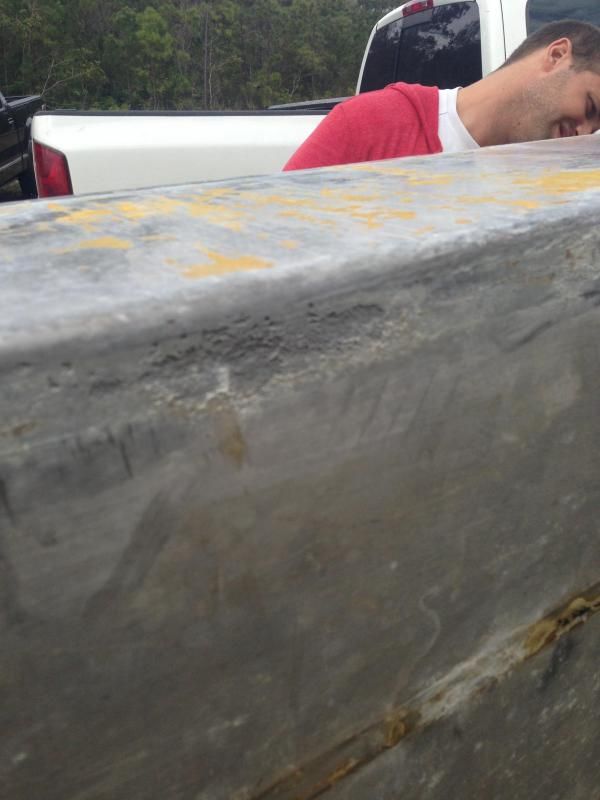
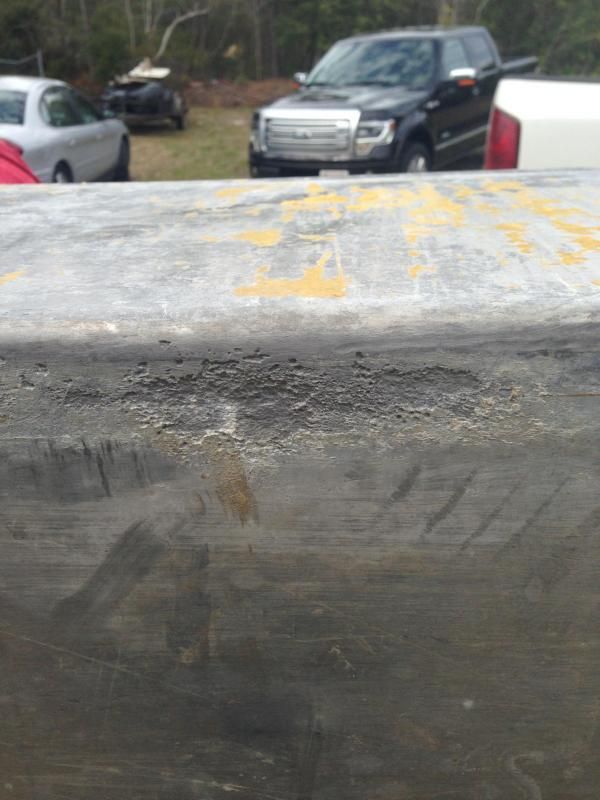
Looking at the fuel tank today and pulled off the rubber strips that apparently were installed by the tank manufacturer. The only pitting on the tank is under the rubber strips. Very little pitting overall on the tank. This is the worst area on the tank and I am wondering if this one spot has killed the tank? I dropped it by the local welding shop and they are going to look at it and determine if it can be repaired? Anyone have a fuel tank repaired?
 
|
|
#2
|
|||
|
|||
|
That looks ruff, I would look at getting a new tank while you are doing so much already. Bad to do everything you are doing and skimp on the tank. My dad is the shop foreman at Custom Marine here in Newbern and he has done welding repairs on aluminum tanks before so it could be fixed but I thinks it would need a whole New bottom welded on it. My guess you will spend about half getting a new bottom as a whole new one.
__________________
Current SeaCraft projects: 68 27' SeaCraft Race boat 71 20' SeaCraft CC sf 73 23' SeaCraft CC sf 74 20' SeaCraft Sceptre 74 20' SeaCraft CC sf |
|
#3
|
|||
|
|||
|
Those pits look fairly deep - hope the walls are 3/16". My original one was 1/8" w similar pits - sent it to recycling. I just got a quote from Sunshine - price was pretty reasonable.
|
|
#4
|
||||
|
||||
|
Brian
I think you can fair it with Epoxo 88 if not too large of an area. I have used this stuff on aluminum before. Great adhersion, sand and cold tar/zinc chromate afterwards. Maybe this would be a less expensive alternative? Be sure to wire brush & clean the pitting areas real good first before you mix it. You only have 6 mins to work with so a little at a time. Maybe a pressure test would be in order. A new tank might be your best bet..................Good Luck Go Here---------------> http://fiberglasssupplydepot.com/FAS...-88-PASTE.html
__________________
   1978 23' Superfish/Potter Bracket 250HP -------- as "Americans" you have the right to ...... "LIFE, LIBERTY and the PURSUIT of a Classic SeaCraft" -capt_chuck |
|
#5
|
|||
|
|||
|
If you decide to fix it, be very very careful to make sure you have found all the pits and cleaned them out very thoroughly. Its way too easy to overlook what appears to be minor corrosion, when there is a deep pit underneath it.
|
|
#6
|
|||
|
|||
|
One question..
Is your life worth the cost of a new tank ?? I would consider replacing!
__________________
See ya, Ken © |
|
#7
|
|||
|
|||
|
Agree with the above, that looks pretty bad , i would replace it. If it was in the top of the tank a repair might not be as risky, in the bottom you could end up with a bilge full of fuel. And thats not good
__________________
"Lifes too short to own an ugly boat" |
|
#8
|
|||
|
|||
|
I know the cost of these rebuilds can get out of hand, but this is no place for short cuts. I've done 2 partial rebuilds, and I'm a low budget guy, but fuel tank replacement was always a requirement. When I pulled the tank from my 23, it looked better than yours, but I replaced it anyways.
You know that tanks has pits, and there is no patch that will give you peace of mind. Bite the bullet and get a new tank, maybe you can gain some fuel capacity  Be sure to epoxy coat the tank and use these when you install the new tank. http://boatbuildercentral.com/prodde...4#.U0XpRxZOTdk Good luck Lloyd
__________________
1973 Seacraft 20' SF "Sea Dog" 1988 Tracker/Seacraft 23' WA "Salty Dog" |
|
#9
|
|||
|
|||
|
No matter what the thickness is of the tank, the pitting looks like it goes half way through the tank- I don't like the looks of it at all. When doing anything with gasoline or gas tank systems; remember that the awesome fiery explosions in action- adventure movies are done with GASOLINE.
Safer is better; skimp on something else, or slow the project down so that the budget can catch up. Good Luck
__________________
Bill Potter 18' 1978, Yamaha 130 23' CC 1986, T Suzuki F115s (current full custom project) |
|
#10
|
|||
|
|||
|
I suppose you could consider Capt. Chuck's procedure and then wire wheel the entire tank down and wrap it with a couple layers of epoxy and cloth. If you lay right up to the sending unit and fitting bosses and then wipe the transition area with liquid electrical tape, I've found it allows you to remove the sending unit or change the fitting if you ever need to but keeps the water from trying to work between the epoxy shell and the aluminum tank. I just did that procedure to a brand new tank, because I hate doing the same thing twice - even if they're decades in between the occasions.
Brian FYI - The new thick walled tank I just bought was 75 gallons, had three pick-ups, vent, fill, sending unit, was "vee" bottomed and ran about $785 with tax - Mattson Seamount, Tampa. They can weld up anything except "A broken heart" or the "Crack of Dawn"!! |
 |
|
|