 |
|
#1
|
|||
|
|||
|
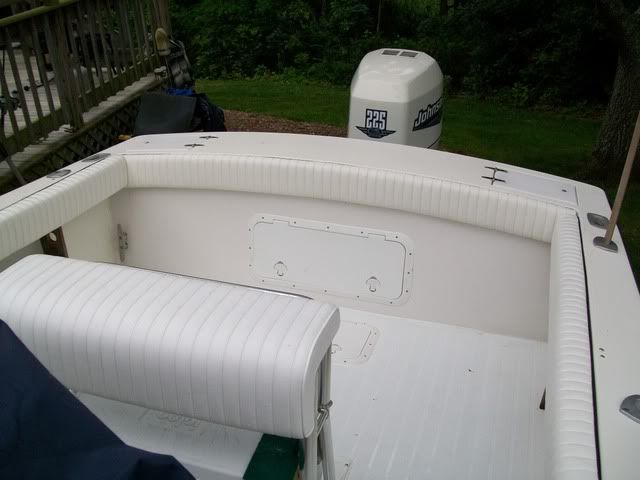
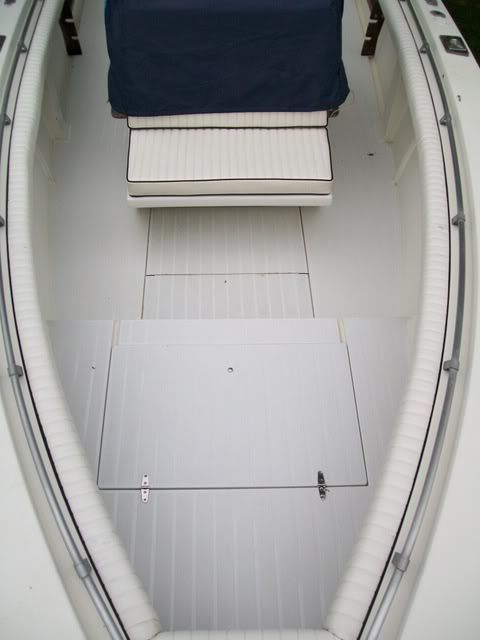
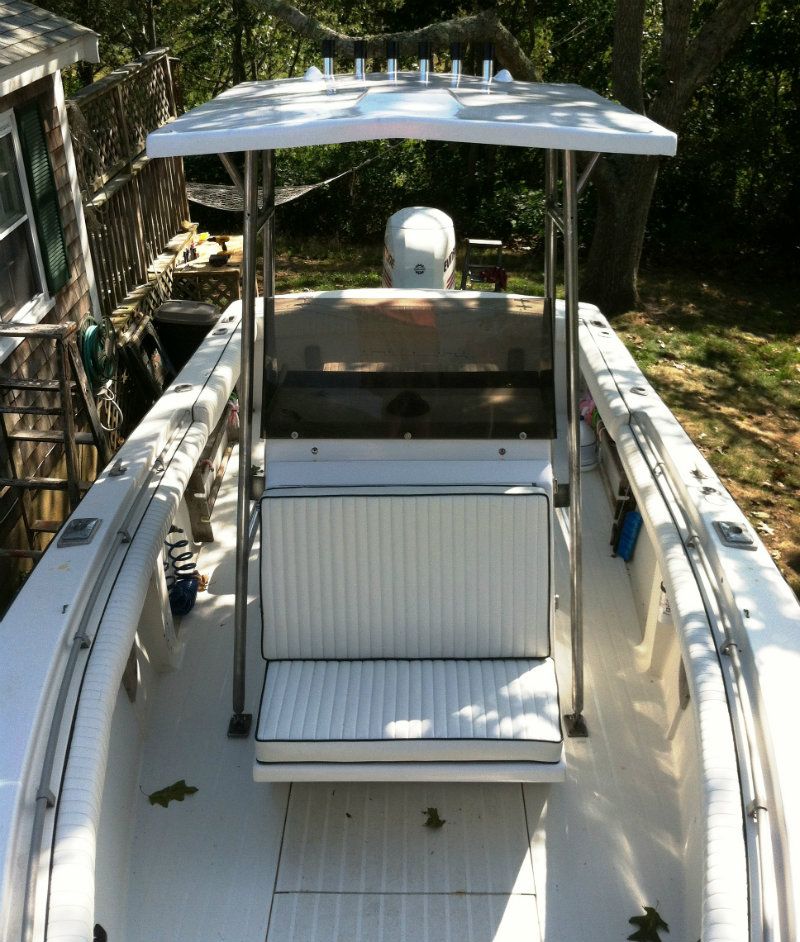
First time long time. Recently bought the 85' 23CC that was for sale here in Sept. After reading a few threads I will be tackling making my bolsters. Based on the holes it looks like the original bolster ran the length of the hull. Does anyone know if they where 3 sections on each side, also it looks like the bolsters where wider in the back and taper towards the bow. I'd luv to see a pic if anyone has one
Thanks for having me. |
|
#2
|
|||
|
|||
|
Not sure how it was originally, but I put a wider piece aft ,up to the bow rail . then went one piece,half inch pvc from 5.5" to 4.5" all the way fwd.also a small bolster across the front .pleated material.3 pieces just didn't look good, enough,even if it was original.
|
|
#3
|
|||
|
|||
|
|
|
#4
|
|||
|
|||
|
there is 3 sections on each side will try and post pics
|
|
#5
|
|||
|
|||
|
Thanks Caps,
FAS, thats the same dimensions on mine. With over 18.5' just on one side, looks like 3 separate pads, with one section being 8' long I hope the vinyl doesnt wrinkle towards the bow. After spending more time then I wanna admit looking for the correct foam...rereading Old'sCool's thread I think the picture is looking much clearer. Imo, that really is one of the most informative well done DIY threads. I initially thought one layer 1.5" or 2" thickness would be all thats required for the factory like look,,not so. O'sC, when you mentioned the 1/2'' foam was that also #6130? |
|
#6
|
|||
|
|||
  2 in back 2 real long up sides 1 in bow 1 on transom Mine were not original 1974 but they were circa 1979 made by the ladies that made the seat covers ect for Mr Potter. They sat new in storage until I installed them. Capt. Chuck knows more about this. Old Schools are just like them. The bolsters break on the sides where the hand rail ends making for two pads to cover one side. 
__________________
__________________________________________________ ________________ 1974 23SF |
|
#7
|
|||
|
|||
|
wow. hermits look great. little thicker than mine,like it ,any one one want to post a 3 piece to compare ?we'll wait a couple daze..
|
|
#8
|
|||
|
|||
|
Quote:
|
|
#9
|
|||
|
|||
|
I'd like to pass along few tid bits on my recent bolster project.
Because of the flare at the bow the backing has to be done with a template first. Once I cut the backing to size I stapled 3'' pieces of piping along the top edge of the backing, this will allow me to get a smooth exact transition off the gunnel prior to drilling any holes. I went with the 2'' foam but after making a sample bolster its looked to square imo. I played with dimensions by cutting the corner of the foam with electric knife which worked great. Leaving 3/4'' on the short side and 1 1/2'' on the long side I marked 2 lines for an easy straight cut. Also, 1/2'' over hang on the backing. Prior to beginning stapling the vinyl to the backing, I stapled 4 staples on one end stapling to the table, this allows me to get a real tight stretch on the vinyl and will eliminate wrinkles at the bow. Stainless 1/2'' staples worked best I'll post some pics later on. |
 |
| Thread Tools | Search this Thread |
| Display Modes | |
|
|