
 |
|
#11
|
|||
|
|||
|
nice job! thats the way to do it right....
|
|
#12
|
|||
|
|||
|
Hey all- well its on to phases 2 and 3 now- since the summer is screaming by and the friggen billfish bite is insane i thought i might just pull and paint the rear hatch, inspect the fuel tanks and take care of the normal bottom/hull haulout stuff-zincs/paint-etc. anyways after getting that big -heavy ass rear hatch removed i inspected the bottom of it expecting just laminated plywood on the backside like I have seen on some other "well known" boats. Much to my pleasant surprise there is laminated plywood ,along with laminated ribs spaced every 20 inches or so. no water intrusion whatsoever-(see pics). So looking at my tanks and bilge they didnt "appear" to be too awful bad so I poked and prodded the "dreaded foam" around 2 sides of the tanks and it seemed dry. (seemed is the key word here). I was doing some repairs on the deck piece and pondering paint and such when curiosity got the better of me. There was an area with a slight amount of corrosion on the filler tube of the starboard tank that just on a whim I sprayed with wd-40 and an area immediately turned black. Damn I didnt like the llooks of that so i said the hell with this , i am going to prod this foam a little more and then started seeing some moisture. Now flashback to february when striper season was winding down- one day i noticed my stbd fuel gage on "E". didnt think much of it but thought i had fuel in it so maybe the sending unit wqent bad which seems to happen occasionally. Well to make a long story short and two days of diggen out nasty water soaked foam, I found a hole about 3/8" wide by 1/2" long in the forward end of the tank. I guess Im lucky me and my buds werent the next shuttle test pilots. Never smelled any fumes at all though so go figure. Now its replacing both tanks , hoses etc and then Ill worry about the decks and cosmetic stuff,lol. Heres some boat porn for you guys that like it. More to come- craig
http://smg.photobucket.com/albums/v4...rhaul-%202006/
__________________
"Lifes too short to own an ugly boat" |
|
#13
|
|||
|
|||
|
Hey Craig, how are ya? Man, now you've got my curiosity. I've always had a strong odor in my garage where my 20 is stored. But this year I've noticed a stronger odor coming through the rigging opening in the floor. I'm not sure that my tank has not been replaced before because the 90* fill on top is ever so slightly taller than what would have ever been factory. Even a very small 6" square access plate over top, yet it is not even close to the thickness of the original hatch. Pretty bad when my battery switch is about 6' above the rigging hole! Take care. Mike.
|
|
#14
|
|||
|
|||
|
hey Mike - if you smell a strong odor then you had better figure out what it isand where it is coming from quickly- i would also suggest disconnecting your batteries until you figure it out!!!! Those tanks in mine believe it or not are not the original tanks either- they were replaced when the diesal was replaced with a gas engine in 1987. (date on top of tank). No sheeter though Mike- if your tanks are original then you probably need to get them out and replace . let us know the verdict!!!!!
__________________
"Lifes too short to own an ugly boat" |
|
#15
|
|||
|
|||
|
Hey Craig, more great info and pics, it sure looks familiar. please let me know who does your tanks and how much they cost. I am definetly doing alot of what you are doing next year. Scarey, how idenical the inards of our boats look. Great job.
|
|
#16
|
|||
|
|||
|
Ha Mike
You might want to take that boat out of your garage until you get her fixed. Gas fumes + spark = one unhappy wife and one replacement house. FellowShip _______________________________________________ My motto: Just for the Grins 
|
|
#17
|
|||
|
|||
|
Craig-
Sorry to hear you are missing all that good billfish fishing but I dont feel too sorry for you because we dont have any billfish fishing over here we have to go and catch those nasty bat rays if we want to have any fun! On a more serious note...it's good to see you found a potential disaster and are fixing it. I'd do away with the foam during this re-model let your bilge breath better. Thanks for keeping us posted. I see you have included the famous toe shot in one of your pics. PS I like your new fiberglass spa cover.  strick
__________________
"I always wanted to piss in the Rhine" (General George Patton upon entering Germany) |
|
#18
|
|||
|
|||
|
Hmmmm, they are some pretty toes huh,strick! glad to hear you are watching my rebuild attempt. I can handle a lot of the mechanical stuff but my glass work leaves much to be desired, so i am studing you guys works of art and will give them my best shot....but i can only hold out so long before i must fish!!!! . I pulled the foam out of the port side tank today and it is completely dry. go figure. I got my rudder stuffing box broke loose today also finally which ive been dickin around with a while. Im thinkin instead of awlgrip on the deck I might just use interdeck epoxy cause it really aint going to do nothing but get beat up again???? (gaff hooks, bats, nets, rod butts etc
 ). Im just not sure its worth the extra cost for the deck. Cap will be a different story. Mama is being unbelievably non-combatent too, i wonder whats up wit dat??? ). Im just not sure its worth the extra cost for the deck. Cap will be a different story. Mama is being unbelievably non-combatent too, i wonder whats up wit dat???   - Im going to use 1/2" solid silicone rubber strips to lay in the hull lengthwise under the tanks and use gary hills method of 3 or 4 coats of epoxy primer on the tanks and use just a minimum amount of foam to keep the tanks from shifting. Ill shoot some pix and keep posting them as i put her back together.- - Im going to use 1/2" solid silicone rubber strips to lay in the hull lengthwise under the tanks and use gary hills method of 3 or 4 coats of epoxy primer on the tanks and use just a minimum amount of foam to keep the tanks from shifting. Ill shoot some pix and keep posting them as i put her back together.- craig
__________________
"Lifes too short to own an ugly boat" |
|
#19
|
|||
|
|||
|
After slow progress since my last update and looks like I am getting a "free trip" via Unckle to Seattle for a few weeks my progress will continue to be slow so I thought I would update my progress . I did remove the old tanks and had new ones fabricated.While I was waiting for the tanks to be madeI took care of some other stuff since I had the hatch removed. I replaced my 4" exhaust hose, Ran new bilge hose,and also removed and replaced all of the fuel lines.One of the things I found when replacing the vent lines on my starboard tank was a nice hole in it that from the looks and location appears to have come from a screw being turned into the hose when the cap was screwed into place via the rubrail. That was a good find.The limber holes that drain from outside the outboard stringer into the bilge were also clogged up and I cleared them up.
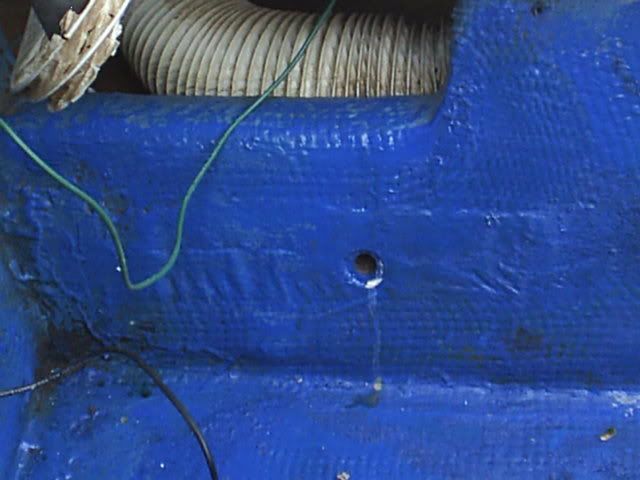 Makes good sense to replace all fuel fittings and hoses when replacing tanks. For whatever reason I have had problems finding my new fill hose so Im still waiting on that and also new sending units for my tanks which I will replace after the new hatch is back in place. Makes good sense to replace all fuel fittings and hoses when replacing tanks. For whatever reason I have had problems finding my new fill hose so Im still waiting on that and also new sending units for my tanks which I will replace after the new hatch is back in place.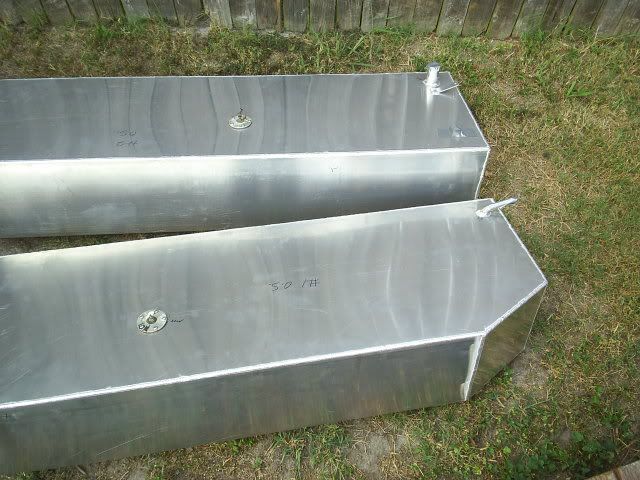 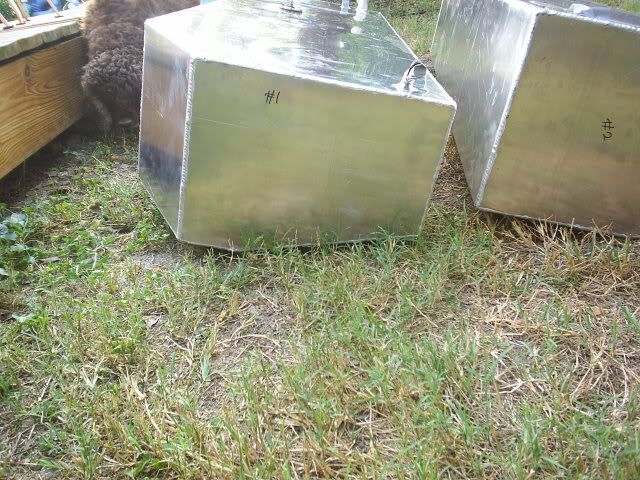 I zinc cromated them and then painted them with rustolium before reinstalling into the boat. 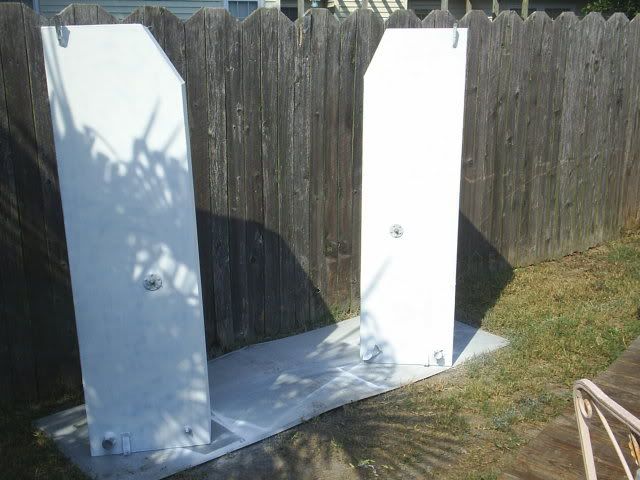 It was a good time to repack the stuffing box on my rudder which was a major pain in the ass because of the very limited amount of room in the hole.I had made some feeble attempts at breaking the packing gland in the past but since it was not leaking never got it done. I ended up having to heat it up with a torch to finally get the nut to break loose. There was quite a bit of shaft play before I repacked it and afterwards it is now gone. Im real happy to have gotten this fixed. 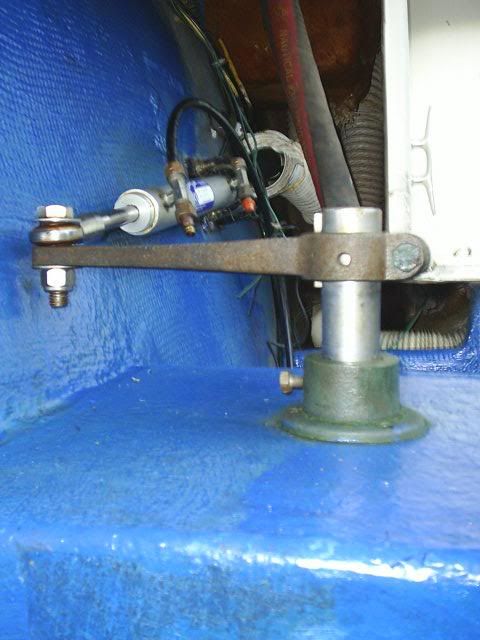 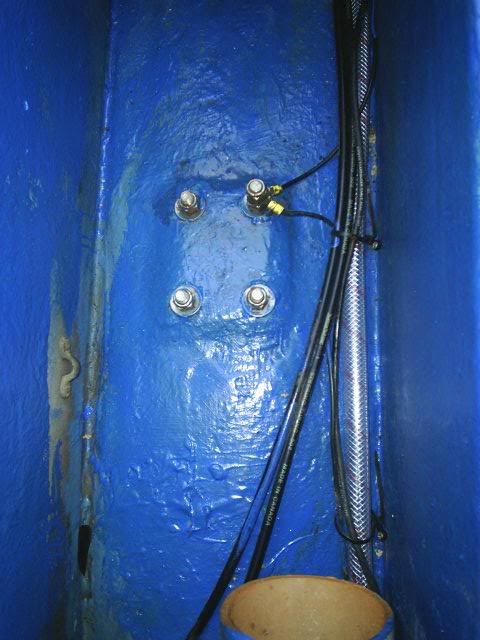 While the other work was going on inside the boat I finished painting my main deck hatch and think it came out really nice. Heavy on the nonskid with 3 additional coats of easypoxy on top of that. 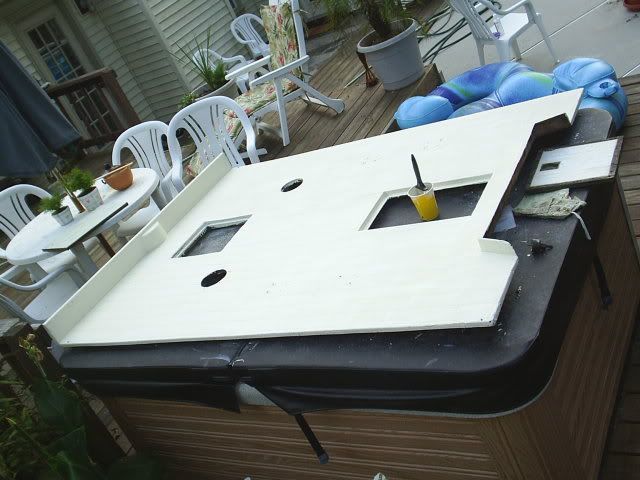 The bilge area is ready for my new gas tanks- I placed 1/8" silicone rubber strips in various locations underneath the tanks to set on. I staggered them as well to allow some air flow and drainage if needed(i dont expect water to get up this high but you never know). I also have routed my new remote bilge pump hose, rerouted my hydraulic steering lines and transducer cable along the inside. 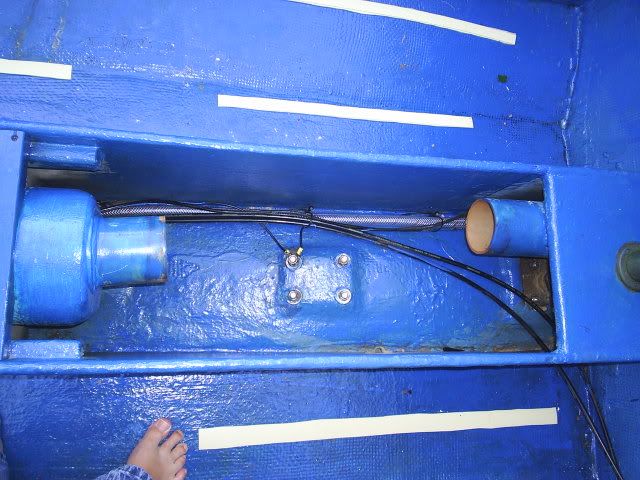 Heres a before pic of the inside of the transom before I got the wiring cleaned up along with the new fuel lines installed. Note the two thin lines where I figured out my trim tab pump is leaking a minute amount of hydraulic oil. Gonna have to figure out why but right now Im not too concerned- hopefully only a gasket/seal or something. (Just something else,lol) 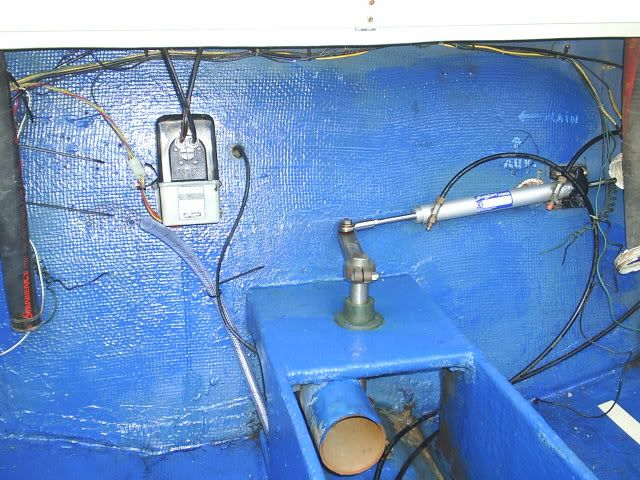 That is as far as this post goes- I have more work done that I will add on after a while showing my new tanks installed. Craig 
__________________
"Lifes too short to own an ugly boat" |
|
#20
|
|||
|
|||
|
Why are you using automotive style crimp connector's in a boat?
Unstead of using crimp shrink connector's. Even then in a wet bildge they should have shrink tubing with the glue covering them. 
|
 |
| Thread Tools | Search this Thread |
| Display Modes | |
|
|