
 |
|
#41
|
|||
|
|||
|
So I got 2 things done today
1. I got the power head reattached to the driveshaft. That was a job. I want a forklift or a chain fall. I did it using a come-along and a ratchet strap. 2. My new hull ID plate came In. What you guys think? By the way I found an old thread by somebody that explains the serial numbers. In my case 25CIO stands for 25í cuddy, Inboard, Outboard. Hoping this will help others. 
|
|
#42
|
|||
|
|||
|
Monday I was working on putting the decks back together. One of the pieces I cut out was rotted through and I skinned it and replaced the core. After that I had to make some cabinet doors.
Today was pouring the rain all day. But I needed to do something so we redid the cabin door threshold. The old one was painted, crack and termite eaten. Note teak is $31/bd foot here. That’s 12” wide x 12” long by 1” thick=$31. But what can I say, it’s worth it! Dimensions on this threshold piece are 4.75” wide at base x 23.125 (1/8”) length x 1.5” thick.  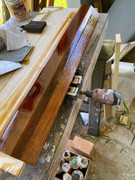  Gluing up teak is not really that hard, but you can’t just slap the glue and clamps on. The key is to take acetone and paper towels or a WHITE shop rag (red will bleach out and ruin your piece). Go over it several times the oil will be sucked away. Setup your saw with a ripping blade at 45 degrees on 4.75”. 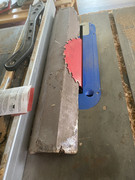 Make one pass. Turn end for end and make second pass. I then cut to thickness on edge at 1.5” in retrospect cutting that first might have been easier on me but harder on the blade. If you’ve never made tenons etc, cut it first For safety.  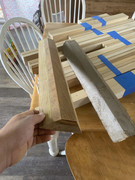 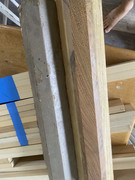 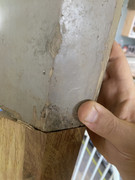 4-5 coats of teak oil. I don’t really count I’m just looking for build up when it stops soaking in. 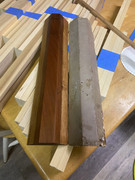 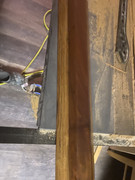 I’ll finish it using the same process outlined before. Note this finish will need to dry overnight maybe longer. The shellac dries in minutes so no worries but the Pettit flagship will take hours to dry. |
|
#43
|
|||
|
|||
|
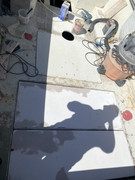
So the deck got glassed back in on the piece over the fuel tanks, I had to cut it out in order to get access to bulkhead.
 Having a serious dry run on fishing. No ahis (yellow fin tuna) or onoís (wahoo) in last 6 trips. On the plus side weíve found dolphins last 3 trips. And young brothers lost 12 containers off the ship Sunday night we found them Monday. 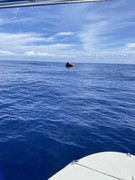 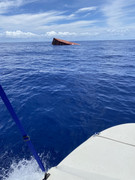 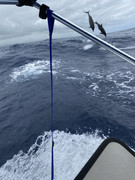 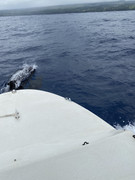 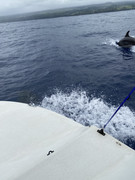
|
|
#44
|
|||
|
|||
|
Started priming the topside today.
Am all out of primer 4:1 so 5 quarts and still not enough for 1 coat. I’ll have to go cross island to get some more and a 2nd gallon of paint. Thought 1 of each would be enough Understanding please: 1. It’s no dry yet and light does weird things 2. It’s not even a full coat, yet. I’ll inspect for defects and then redcoat the main areas again. Unless it’s under non-skid....but my ocd might kick in. Love seeing everybody else’s builds on here. Great to see these boats getting worked on.  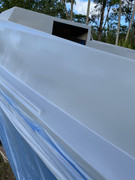 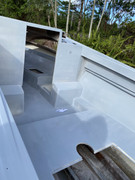 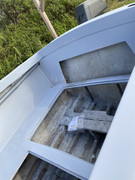 I plan on gelcoating the bilge, eventually |
|
#45
|
|||
|
|||
|
Looking good!
__________________
1975 SF18/ 2002 DF140 1972 15' MonArk/ 1972 Merc 50 http://i833.photobucket.com/albums/z...photos/SC3.jpg |
|
#46
|
|||
|
|||
|
Was finally able to get more primer and some good weather and work issues to all sync up. It’s not been very glamorous. Sanding, sanding and a little more sanding.
On to painting! Wrapped the boat in masking film so wouldn’t get overspray on finished portions. Been working out to in more or less on the cap. I’m very impressed with this valspar tb540pb White paint that a marine store stocks and convinced me to use. It’s about same price/gallon as interlude or Pettit. But, it was much easier to apply than brightsides or easypoxy, faster drying, and amazing results. It’s 4:1, 10-25%. Combined with the legacy primer 9860 also from valspar and some store I’m loving this. I guess this is what many guys use around here. I used grits for non-skid. (Sue me, it’s 2.50/box) and I had some leftover Pettit ezpoxy platinum gray from the hull. I sprayed the hatches white with my hvlp setup. And then rolled on the Pettit with a 3/8” roller and promptly coated in grits. Let sit overnight. Recovered the excess with a brush. Then vacuumed off and shook them upside down. And covered with 2 more coats of paint. I suppose 1 would do but I didn’t put it in too heavy.  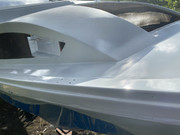 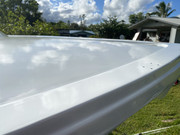  Here’s nonskid on the hatch for cabin. Taping’s not perfect but I let my artistic daughter do it so it’ll be a memory for her Fighting chair hatch over fuel tanks. Getting the 1.5” radius between paint and nonskid was less than fun on curves. With a center point i made a rope compass but on the curve without one. Bust out the trusty combo square... 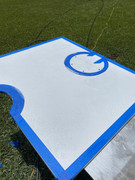 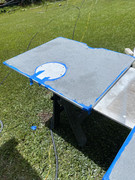 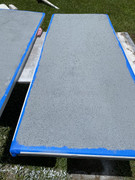 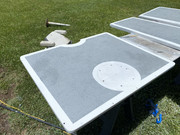 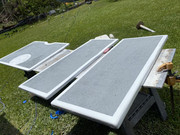 I’ll keep painting as I have time. The top of cap is mostly done. It may need another coat in some areas and some non-skid on the gunnels where you get in. I’m thinking plain white there. The Gray is to tell you this is a safe surface. The white nonskid means use caution anyway. I still have to paint the cabin and most of the deck and nonskid it. Then will be gel coating bilge, teak pedestal mounts, teak helm controls, plumbing, and wiring (Not sure the exact order yet...) I still don’t have a working engine at this point, I either need a 1200 flywheel for my Suzuki 2 stroke, fix these twin ancient evinrude 115’s, or buy something. I hate all my options. And the trailer is whispering sweet nothings in my ear... I’ll need to replace and weld up frame rails, replace or clean up the leaf springs, trailer hubs and bearings, brake lines, and wiring. Wobble rollers don’t look too bad. I toyed with going to bunk trailer but some of these ramps are steep ramps and at low tide it’s worse. |
|
#47
|
|||
|
|||
|
Nice work...good to see you are including your daughter...I have some pics of when my kids were younger helping me out on the boat. You could not give me a trailer with rollers...they put dimples in boats over time...but to each their own I understand the shallow water thing...I had a duo prop volvo out drive with a 350 HP in mine I think...it was not fast at all and I likened it to a strong tractor...lots of torque...
strick
__________________
"I always wanted to piss in the Rhine" (General George Patton upon entering Germany) |
|
#48
|
|||
|
|||
|
Ty, sir. I appreciate all the help and feedback. I canít wait to start putting all the bling on it.
Iím trying to make it a family thing: son, daughters, and wife helping. Hopefully some good memories this way. And a less angry CNO (chief of naval operations). It came with a roller trailer. I was pleasantly surprised to find no signs of dimples in hull although it had been on it for years. Iím still debating it pretty hard. Bunks would be much easier To retrofit in trailer. Iíll post pics when I get there. Itís in bad shape. I have several months to decide. |
|
#49
|
|||
|
|||
|
Cap, deck and cabin are all painted. This valspar tb540pb is just awesome to work with. I like it much better than interlux Brightsides and Pettit EZPoxy. Flows through the gun really well. Dries faster. Has a smoother finish, and seems harder too. Itís been soaked in water with no adverse side affects for about 24-48hrs.
The deckís getting non-skid. Cutting the radii was a challenging task. I found the black lid on my shaker bottle and a quarter to be the 2 sizes I needed for corners etc. Iím using 1.5Ē masking tape for edges. 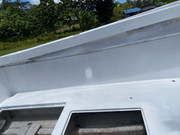 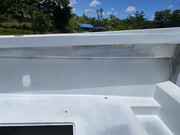  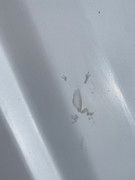  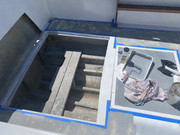 And yes my brand new paint got geckoíed. They are good luck in Hawaii. Not sure if itís good luck that happened or not. But I really donít believe in it. But still no bananas on board....(or anything with a peel). |
|
#50
|
|||
|
|||
|
The decks are done.
I still need to secure the teak racks, bright work, and have a few touch ups to do on paint but Iím pretty happy with it. I still want to cut and buff the exterior with compound and polish. I really donít wanna 2000 grit wet sand it but Iíve done crazier things...  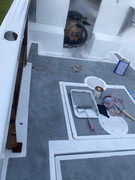 The grits gave a great texture. But the fire ants love these things. I HATE fire ants. The Hawaii small fire ant is murder. Thats the only downside so far. Iíve been rigging up led light strips in cockpit, installing fuse blocks, and planning out the wire routing. Also been making teak pieces for the foot rests and helm station. |
 |
| Thread Tools | Search this Thread |
| Display Modes | |
|
|