 |
|
#11
|
|||
|
|||
|
I am sure there will be a lot less Salmon in the Great Lakes this year because of your Red Baron
 
__________________
[SIGPIC][/SIGPIC] "If You Done It...It Ain't Braggin" my rebuild thread: http://www.classicseacraft.com/commu...ad.php?t=18594 |
|
#12
|
|||
|
|||
|
Wow! Nice work!
The motor looks beefy. What did you add/change/delete? Why did you gel coat below decks? I think hermit used epoxy primer, but I think gel coat is cheaper, right? |
|
#13
|
|||
|
|||
|
great job on your boat what type of fishing do you do
__________________
Kevin |
|
#14
|
|||
|
|||
|
John-
Beautiful job!! Thanks for taking the time to post the links. Those are interesting seats where did you get them? strick
__________________
"I always wanted to piss in the Rhine" (General George Patton upon entering Germany) |
|
#15
|
|||
|
|||
|
Thanks for all the kind words guys.
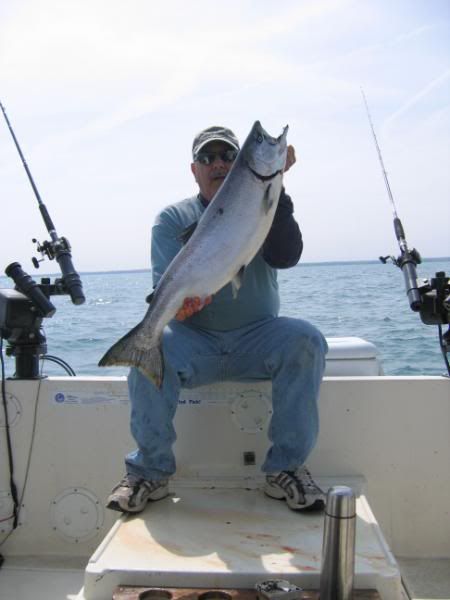
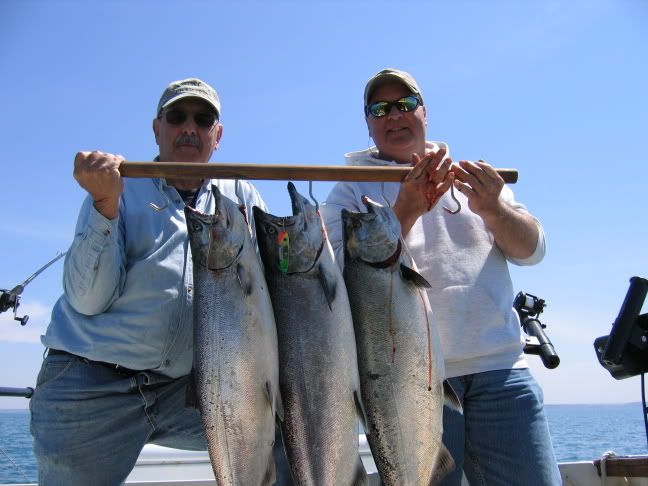
KENB, the engine is a 350.I put new exhaust manifolds and risers on it along with a new water pump,plugs, wires,hoses etc. It really didn't need all that,but i figured while it was out it was a good time to do it. I also put a new intake along with a Edelbrock 600 cfm 4bbl marine carb on it. It had a two barrel on it,as the guy blew up the previous block.He ordered the new engine,and threw all his old stuff on it. I wanted a bit more power,and it was really under carbed(the previous eng was a 305. Captainkass, All my fishing is Great Lakes salmon trolling.I keep the boat at Olcott on lake Ontario.(about 15 miles from the mouth of the Niagara river. It's mostly downrigger and wire diver fishing. I'll post a picture of one of the salmon at the end of this post Strick, If you mean the frames,we bent them out of Aluminum tubing.I used alum.handrail fittings to attach them to the floor and sides. I was going to use pedestal mounted seats,but we need all the room we can get for tackle boxes and other bulky stuff. These frames let us slide a lot of stuff under them. The seats themselves,are Tempress seats,(the $100.00 dollar ones)They really aren't the right seats for this boat,but money was getting tight,so they'll do for a while.They're actually very comfy,but they look a little weird mounted this way. Captainkass,here's a pic of a few salmon we catch on the Great Lakes.      
__________________
All this,just for a boat ride |
|
#16
|
|||
|
|||
|
Excellent job. Great looking arch, enclosure, and hull color. Those salmon look tastee! What a great set-up with the yami kicker
__________________
Snookerd |
|
#17
|
|||
|
|||
|
Awesome work...!!!
-FRED
__________________
"...Southern by the grace of God" |
|
#18
|
|||
|
|||
|
I really like those 10 cup holders.... (I mean beer holders)
 Real NICE JOB !!! See ya, Ken
__________________
See ya, Ken © |
|
#19
|
|||
|
|||
|
WOW ! Been there, done that ! Each picture brought me back to my resto. I was itchy just thinking of the work you did.
The end result is fantastic. You made yourself a custom boat. Enjoy the h*ll out of it. I was wondering, how did you mount the tubular seat frame to the the inner liner ? Is it bolted through the hull ? |
|
#20
|
|||
|
|||
|
Quote:
Yeah,you're right,I never want to see a Tyvek suit again. The seat frames are mounted to the floor with ss screws into the deck,along with 5200 sealant. The mounts to the sides were a bit difficult,especially the ones that are in the upper part of the liner. The space between the liner and hull at that spot is only about 1/2". We ended up using this tool that is kind of like a pop rivet gun,only it installs threaded inserts,that are only about 1/2" long. A friend of mine is a mechanic at a chemical co,and he was able to borrow it. We marked where we needed the holes and installed the inserts,and used 5/16"x3/4" stainless machine bolts to mount the flange. They were just long enough to hold,but short enough to not touch the hull. The rear tube is mounted to the pillar,so we could thru bolt those.
__________________
All this,just for a boat ride |
 |
|
|