
|
|
#52
 07-06-2009, 11:36 AM
|
|||
|
|||
|
Thanks Hermco!! - The lid was glassed on all the way around from the inside. We put 3 layers of 4" 1708 tape on the seem from the inside on the front and 2 on each side. I think the 2day resin head allows me to quickly forget how much work goes into these brackets. $792 materials + over 80 hours . . . that coupled with the fiberglass itch, 3 pairs of clothes (ruined), and the figerglass snow in the new shop . . . will stop me from doing another bracket.
John - It's looking great!! Keep me posted. Go blue with the bracket!! 

|
|
#53
07-06-2009, 11:52 AM
|
|||
|
|||
|
Outside at the top of transom and cap joint has a tendency to get hairline cracks over time. I grind and glass this seam. Not structural in nature but if you used wood for core water can intrude over time and rot core.
|
|
#54
07-07-2009, 07:17 AM
|
|||
|
|||
|
"Go blue with the bracket!!"
Well...that pic got me thinking....I went blue...1st coat went on and it looks great. 2 more to go. I copied Bonefish's tape job basically. Blue bracket white deck on platform. Hi Don. That artwork you do down in Stuart is truely inspiring. BUT..I think I killed Bigshrimpin with this project  You should see him sand in his flip flops You should see him sand in his flip flops  No wonder he itches all of the time. Big...I also added some glass on that seam/joint you told me to do (2 layers inside and out). With the platform core molds glassed in place the whole thing is SOLID and nothing short of impressive More pix soon...after that I'm going fishin. No wonder he itches all of the time. Big...I also added some glass on that seam/joint you told me to do (2 layers inside and out). With the platform core molds glassed in place the whole thing is SOLID and nothing short of impressive More pix soon...after that I'm going fishin. 
__________________
__________________________________________________ ________________ 1974 23SF
|
|
#55
07-07-2009, 03:31 PM
|
|||
|
|||
|
Quote:
 I have a feeling that your boat is going to be rigged and running very very soon. I can't wait to see it!! Don't forget to use HUGE (2" squares or larger) washers or backing plates when you mount it. I have a feeling that your boat is going to be rigged and running very very soon. I can't wait to see it!! Don't forget to use HUGE (2" squares or larger) washers or backing plates when you mount it.
|
|
#56
07-16-2009, 05:24 PM
|
|||
|
|||
|
Hey John - Did you get that bracket on the boat? I'm dying to see pics
|
|
#57
07-16-2009, 05:50 PM
|
|||
|
|||
|
Well..Thanks to your expert instructions...we pulled the template...pulled the level line...center line...and went with 4.5 inches above the keel. It looks great. It bolted right up perfect on the first try. Then my helpers cell phone rang and he split
...I will glue/bolt this weekend and hang the motor It looks awesome. Here are some pix....she has been named too. 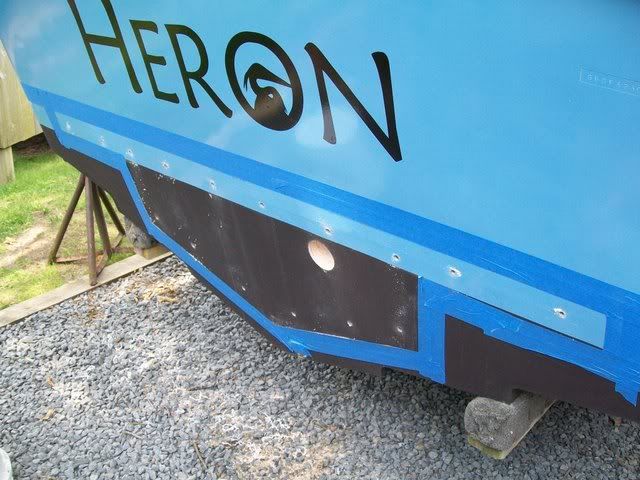 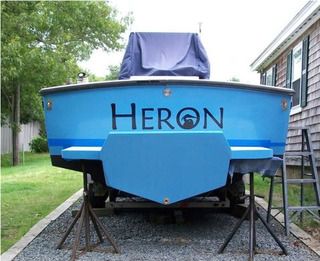 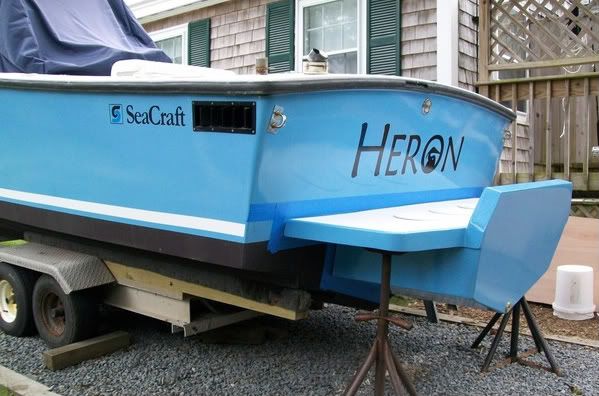 You can see I had to bail on the boot stripe on the transom. I may do some delatil on the end of it but for now it was just moved out of the way. It kills me I have to cover 3 coats primer and 3 coats Signature finish with bottom paint....most of it will be black in the end...but the bracket has a good coating on her.
__________________
__________________________________________________ ________________ 1974 23SF
|
|
#58
07-16-2009, 05:59 PM
|
|||
|
|||
|
Great job guys! Looks fantastic. Sweet name and artwork, too.
__________________
there's no such thing as normal anymore...
|
|
#59
07-16-2009, 11:39 PM
|
|||
|
|||
|
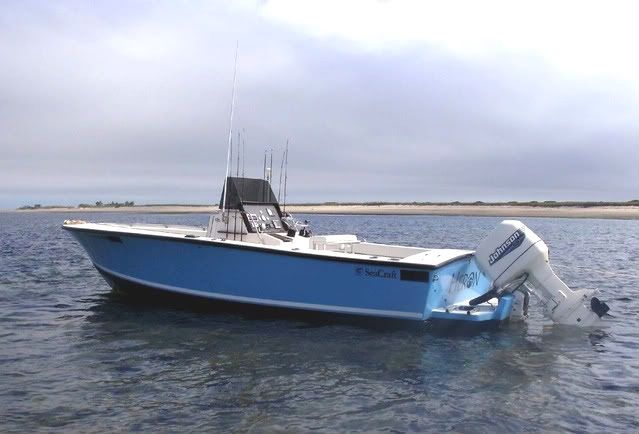
Wow . . . I love it. The name and the graphics are perfect!! You got me second guessing the bottom paint too. Is it going on a mooring?
|
|
#60
07-22-2009, 10:01 PM
|
|||
|
|||
|
Well...slowly working and getting closer to splash day. Tim's Bigpimpin bracket has been bolted on with a total of 16 bolts
. 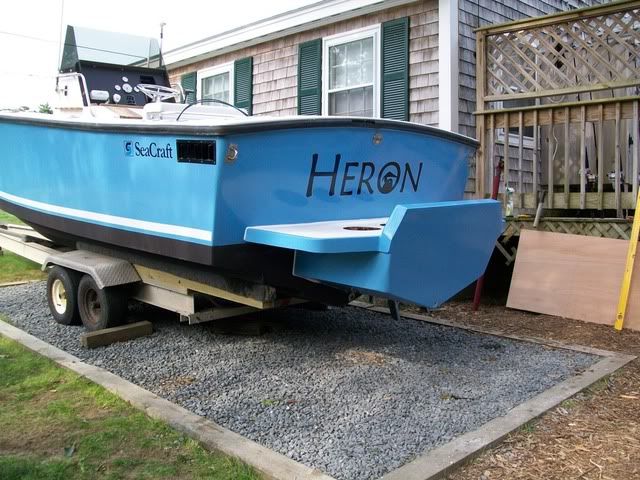 Everything was backed with some plate alum cutouts I made from an old transom plate.  We used 4 tubes of 5200 of which most of just squeezed back out ") but I would hate to have to remove it. but I would hate to have to remove it.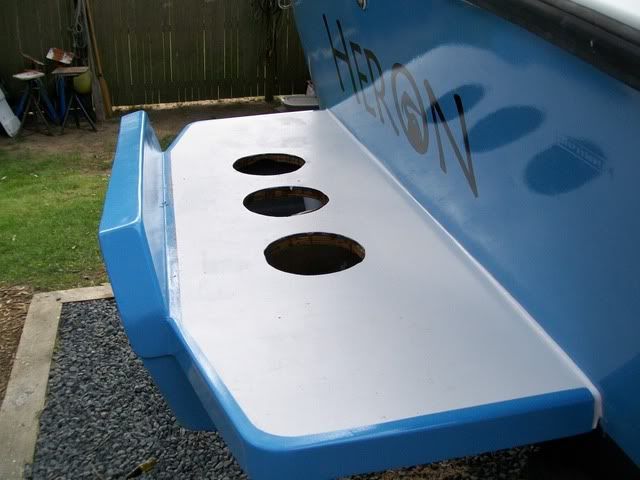 The big thirsty pig has been mounted and rigged and only awaits gas and oil to come back to life...did I mention gas 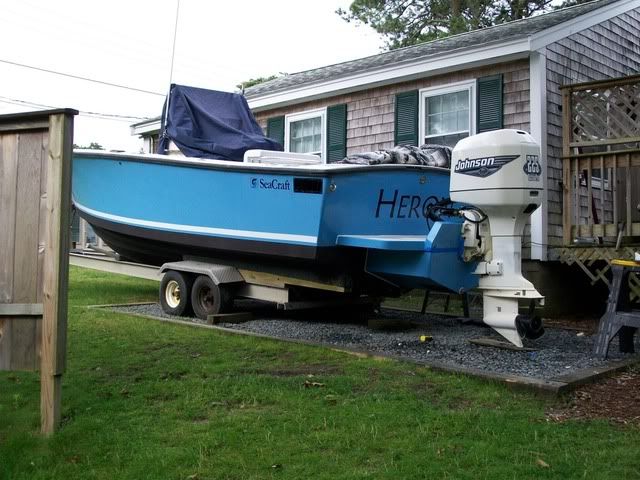 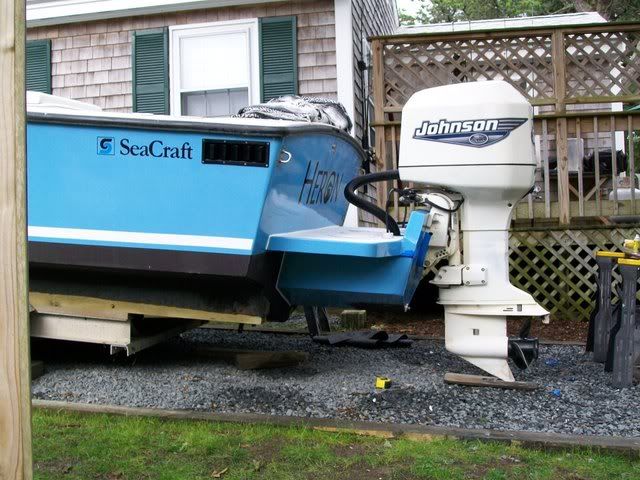 I have spent the last couple of days bottom painting the bracket tub, installing the washdown pump, racor, and rigging in the bilge. The bilge is looking nice an neat and I am hung up on what to do about the icebox drains. I had installed thru hulls into the bilge and intended to run a 3/4 tube over to a side thru hull that would drain both. Now I am just scratching my head and pacing the yard on what to do. I am thinking the flared brass thru hulls thru the transom would have been just fine put back. Is anyone draining these into the bilge and pumping? My boat will be moored. My single thru hull idea puts my thru hull down by the boot stripe for adequate drainage. I'm all ears Another trip up is mounting the transom mount ducer that I got with the Garmin FF from Rich (awesome deal). I am trying to figure on the best spot to punch a whole thru to feed the wire back into the bilge and up to the console and FF.
__________________
__________________________________________________ ________________ 1974 23SF
|
 |
| Thread Tools | Search this Thread |
| Display Modes | |
|
|


 Linear Mode

