
|
|
#11
 12-01-2010, 09:40 PM
|
|||
|
|||
|
APL,
when I had to get rid of old fuel I used the priming bulb and siphoned it out into cans then ran about 5 gallons per fillup in my gas burning Z71. No problems at all. As far as backing tape for epoxy, I have used painters tape many times and it works fine. Peels right off once the epoxy has set up.
__________________
Will 
|
|
#12
01-03-2011, 12:42 AM
|
|||
|
|||
|
Now that the weather has improved I got time to hot this project hard. In about 4 hours time I was able to remove the console from the boat entirely (all wiring cut, needed to be redone anyway, and used the grinder to slice through the steering cable, it was seized anyway, no loss)
http://i137.photobucket.com/albums/q...10102-1235.jpg Next I cut the outline of the deck with an 10 amp (yes, this is what you want, dont go cheap, you will regret it later) Dewalt angle grinder with a diamond multipurpose 4.5 wheel on it. I got lucky and began to tear up the deck at a soft spot, which yielded me much headway. I think I have a new mantra "rotten wood is a blessing in boat repair" or something to that effect. The only part that really gave me a difficult time was the few places of dry wood. It was rather enlightening when cutting up the deck to tear up parts that 'seemed' solid, only to discover rotting wood lying beneath. I also noticed something while tearing up the top deck, has anyone else noticed that the factory non skid seems to be a vinyl sticker? http://i137.photobucket.com/albums/q...10102-1344.jpg The before http://i137.photobucket.com/albums/q...10102-1316.jpg During http://i137.photobucket.com/albums/q...10102-1414.jpg http://i137.photobucket.com/albums/q...10102-1541.jpg After http://i137.photobucket.com/albums/q...10102-1502.jpg All in all it took me about an hour to take up the floor once I got into the swing of things. You will see in the last picture on the port side of the deck are the scraps. I didnt feel like loading them into the pickup to dispose of, and my console is still in the bed, Ill get to it as soon as I get the foam out. http://i137.photobucket.com/albums/q...10102-1357.jpg http://i137.photobucket.com/albums/q...10102-1357.jpg What I found odd about the foam was that it appeared to be two different types of foam. The one in thoes pictures seemed to have been added later on (judging by color and texture) but it would have been impossible due to the location and this being an origional deck. Well good news and bad news, not all the foam is wet, actually a lot of the origional foam seems to be good and dry, but Id like to remove it anyways just so I dont have any problems later on. I noticed when I was pulling up the deck that I may have taken the layer of mat up that was intended to encapsulate this foam in the stringer system. Has anyone else encountered exposed cuts in the top of their stringers (presumably to add foam)? http://i137.photobucket.com/albums/q...10102-1415.jpg http://i137.photobucket.com/albums/q...10102-1432.jpg That sure is a lot of Potter Putty http://i137.photobucket.com/albums/q...10102-1541.jpg Wires http://i137.photobucket.com/albums/q...10102-1431.jpg Original deck thickness http://i137.photobucket.com/albums/q...10102-1503.jpg Stringer cut and not reglassed. Clearance required for fuel hoses from tank to filler. http://i137.photobucket.com/albums/q...10102-1442.jpg I have been finding this stuff all throughout the boat. It to me seems to be east coast FL beach sand (corse, complete with small little shell fragments in all). There must be 20+ lbs in here. I wonder if that may be a sign of a boat that was sunk for a few days. Thats the only thing that I can think, there is no evidence otherwise though. <a href="http://s137.photobucket.com/albums/q231/ML32AMG/?action=view¤t=IMG00145-20110102-1541.jpg" target="_blank"><img src="http://i137.photobucket.com/albums/q231/ML32AMG/IMG00145-20110102-1541.jpg" border="0" alt="Photobucket"></a> Beer time. Anyone want to wager a bet on the age of this can? Old Ill tell you that, look at the pop top, I found this down in the gunnel. http://i137.photobucket.com/albums/q...10102-1439.jpg When the boat is done she will be sporting this old gem that I found in the house. It is suppose to be yellow with a dark blue outline, sun faded. http://i137.photobucket.com/albums/q...10102-1842.jpg Thats all for now. Id appreciate any comments or suggestions.
|
|
#13
02-21-2011, 06:06 PM
|
|||
|
|||
|
The weather has improved somewhat down here, and another payment on boat storage motivated me to get the ball rolling again.
Since the paint on the hull was old and brittle, I figured the best way to remove it would be with a pressure washer. It made short work of most of it. It took about 8 hours total to do the entire boat. Some parts came off real easy, some were more stubborn, and some will need to be removed with a DA sander. I wanted to use the pressure washer to dislodge any cracked or damaged glass or hull repairs, and sure enough I found some areas that were well hidden by the paint. My buddy Dan gave me a hand with this task and in the process.  Since the floor is up, I wanted to get the fuel tank out, it had about 30 gallons of fuel in it. The guy who's property the boat is on was cool enough to let me use an old 55 gallon drum to dump it in, and it was conveniently located next to my boat. I brought an old automotive fuel pump that I had in the garage and a deep cycle battery with some jumper cables and kind of redneck improvised using the fuel line from within the boat.. 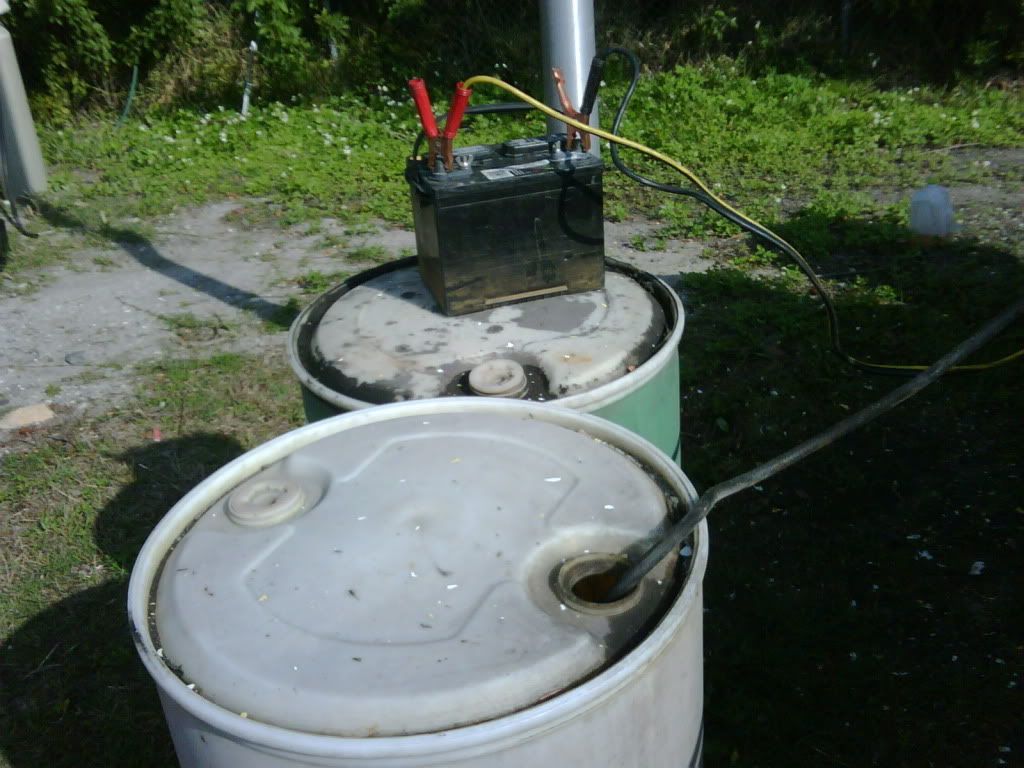 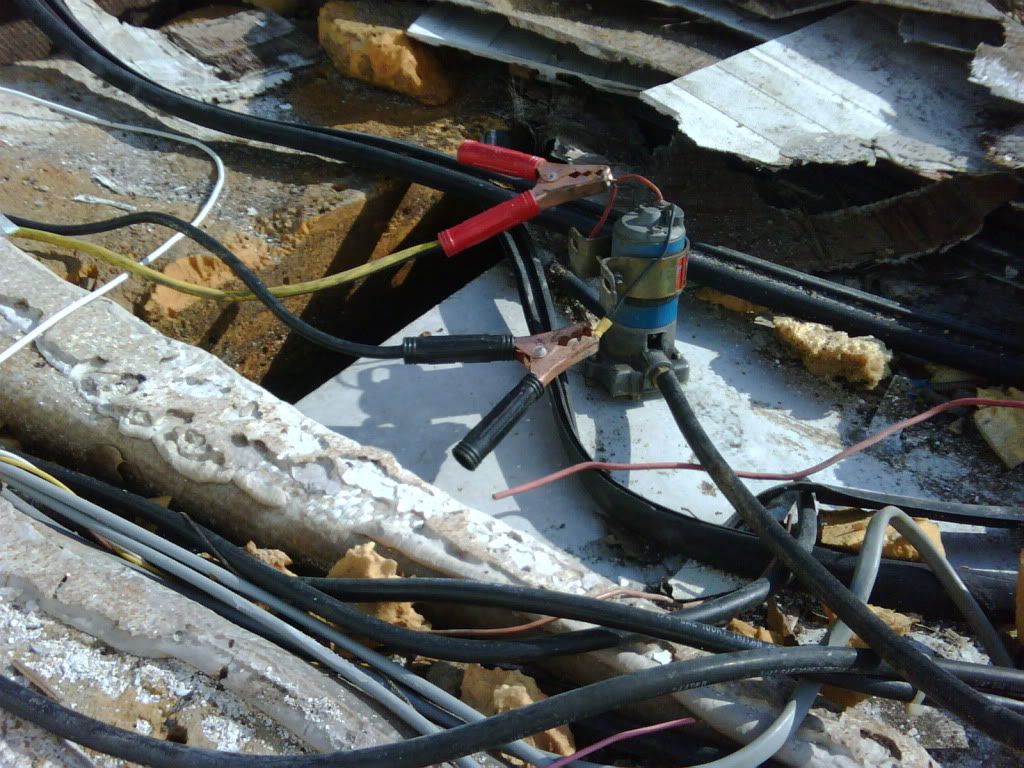 The fuel tank was easy to remove once empty. It slid right out. Upon getting it on the ground I noticed the manufacturer or installer had placed rubber strips on the bottom, removing them yielded some corrosion, but nothing that seems too bad... I cleaned it up with the pressure washer, hoping to loosen any bad spots. I intend on pressure testing with my compressor before re-instillation. 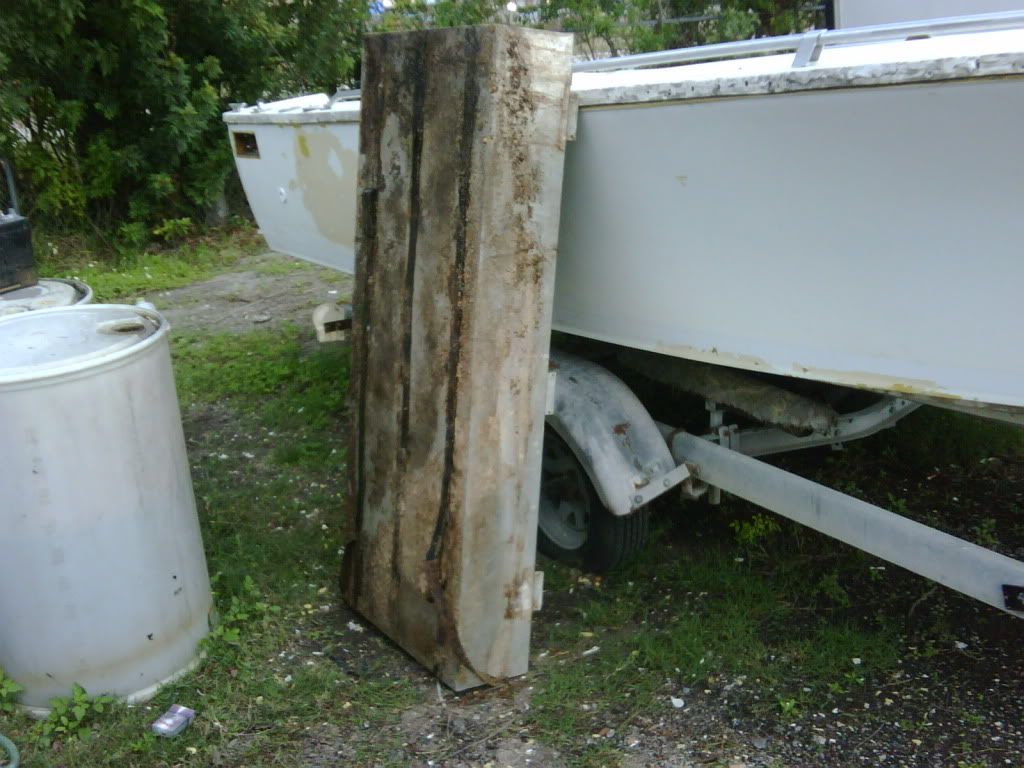 Kinda looks like a dull fighting lady yellow?  When I was uncovering the origional finish, I came across this piece on the port, mid-ship hull, approximately slightly more fore then the fuel filler. I placed my hand in the picture for reference. Any ideas? 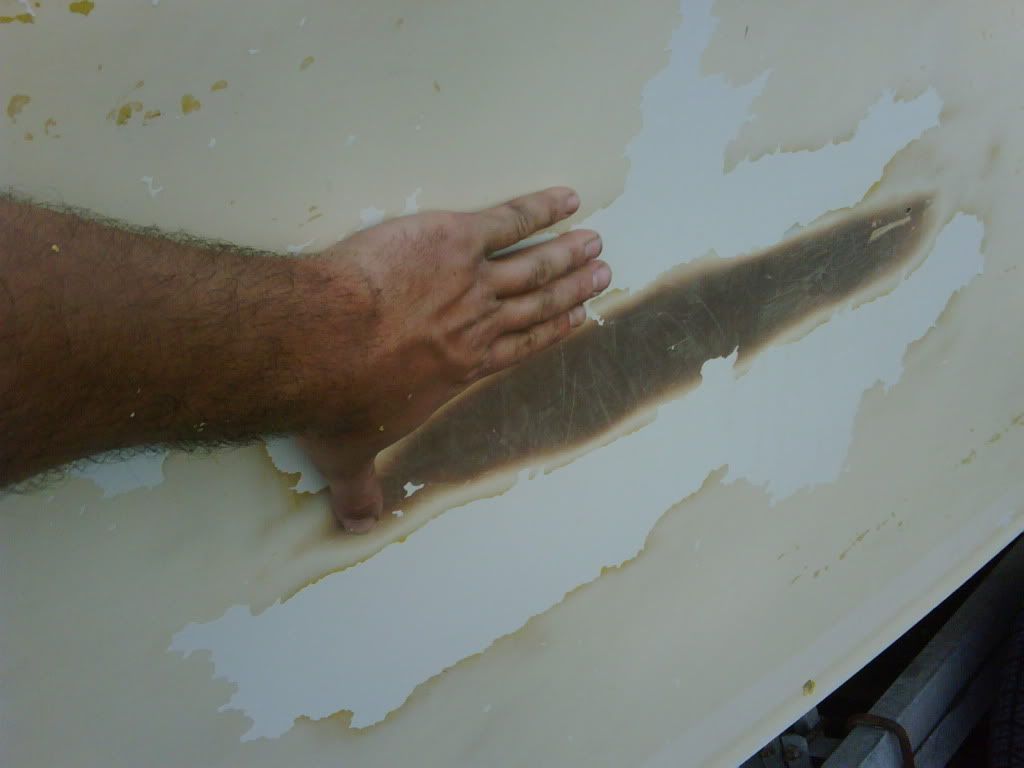 Until the next update...
|
 |
|
|


 [/URL[URL=http://s137.photobucket.com/user/ML32AMG/media/IMG_5701.jpg.html]


 Linear Mode

