
 |
|
#1
|
|||
|
|||
|
1974 20' SeaCraft SF CC rebuild.
I decided to hold off painting the other 74' 20' sceptre project till the first of the year once it warms up a bit unless I can talk someone into letting me use their paint booth. So this little sf cc goes under the knife instead of finishing the first sceptre project of the year. I did do the electrical wiring on a paint booth few years back at a local car restoration shop and maybe I can use it but as of now I am going ahead and starting on a second "winter" project to keep me busy. Plans are to finish the work on this one so both can be painted at the same time in a few months once it gets back warmer outside. Wanted to start on the race boat but it will not fit into my current work shop and I dont have the new building addition for it finished yet either will it be heated so this 20'er went under the knife instead. This section of the building is heated so no worries with the resin kicking off or working in the colder outside temps. You northern guys are laughing but it can get cold here in NC too! Attachment 5923
__________________
Current SeaCraft projects: 68 27' SeaCraft Race boat 71 20' SeaCraft CC sf 73 23' SeaCraft CC sf 74 20' SeaCraft Sceptre 74 20' SeaCraft CC sf |
|
#2
|
|||
|
|||
|
The transom has been done recently and is in great condition and just needs a little cleaning up. Most of the rest of the boat is in nice condition as well other than the floor. It has a few soft spots here and there. Last night I started looking at the soft spots in the floor and found that it was worst than I thought. So I did a little digging at it and then realized it needs to go. All of it. It looked like someone redone most of it minus the 12" edges closest to the outside of the hull at some point. In the pics you can see where the balsa core is gone around the sides of the floor and where the newer squares of plywood had been changed had soaked up water from the places where the original balsa was left. The new wood was not rotted yet but soaking wet and getting soft. You could not tell this till it was cut into. The wet squares felt solid standing on them but in a year or two all of it would of been soft so I figured the best thing to do is replace all of it. I started cutting out just one spot to see what I would be up against but keep going till I had most of it out. Hard to stop cutting once I get going at it. Found out that all the foam in the boat is wet. There was a large block that was behind the tank without bulkheads just soaking up water. It had 2 holes cut in it so the water could drain past it and out the back. Some one cut holes in top of the stringers and refilled part of them with foam. They did not reseal them so it is wet again. I will remove all of the foam and cut the stringer tops out and make them back 2" taller so I can raise the deck up a little to help the self bailing. Here are a few pics of the tear out. Note the chunk of wood that was glass to the bottom of the floor to keep it from sagging down where the stringers were shorter at the back of the boat.
Attachment 5924 Attachment 5925 Attachment 5926 Attachment 5927 Attachment 5928
__________________
Current SeaCraft projects: 68 27' SeaCraft Race boat 71 20' SeaCraft CC sf 73 23' SeaCraft CC sf 74 20' SeaCraft Sceptre 74 20' SeaCraft CC sf |
|
#3
|
|||
|
|||
|
Thats an interesting looking seacraft. Did someone play with it before you got to it?
strick
__________________
"I always wanted to piss in the Rhine" (General George Patton upon entering Germany) |
|
#4
|
|||
|
|||
|
Quote:
__________________
Current SeaCraft projects: 68 27' SeaCraft Race boat 71 20' SeaCraft CC sf 73 23' SeaCraft CC sf 74 20' SeaCraft Sceptre 74 20' SeaCraft CC sf |
|
#5
|
|||
|
|||
|
Thanks again for the incredible deal on the hull and meeting me so I could get it. She will get some needed attention and love. Hope you are enjoying the new "sf" you got...
__________________
Current SeaCraft projects: 68 27' SeaCraft Race boat 71 20' SeaCraft CC sf 73 23' SeaCraft CC sf 74 20' SeaCraft Sceptre 74 20' SeaCraft CC sf |
|
#6
|
|||
|
|||
|
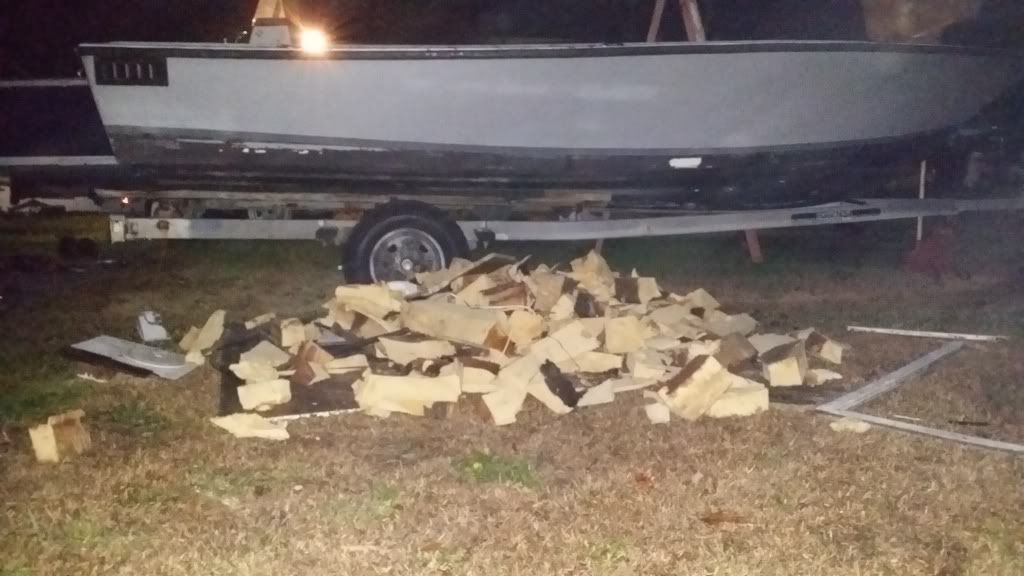
Spent this afternoon removing foam.
__________________
Current SeaCraft projects: 68 27' SeaCraft Race boat 71 20' SeaCraft CC sf 73 23' SeaCraft CC sf 74 20' SeaCraft Sceptre 74 20' SeaCraft CC sf |
|
#7
|
|||
|
|||
|
my decks are ok now but if I had to repair later on is there a real advantage to the squares rather then a dull piece of plywood ?
|
|
#8
|
|||
|
|||
|
Quote:
Here is a section of deck I did: I waxed the surface them primed it with a high build primer then layed a layer of csm first then a layer of 1708 then another layer of csm again on top of a mold table.... The first layer of csm is going to be the top of the deck and the csm will prevent print threw of the 1708 from showing in the primer. The other layer of csm is to help bed the wood squares into. 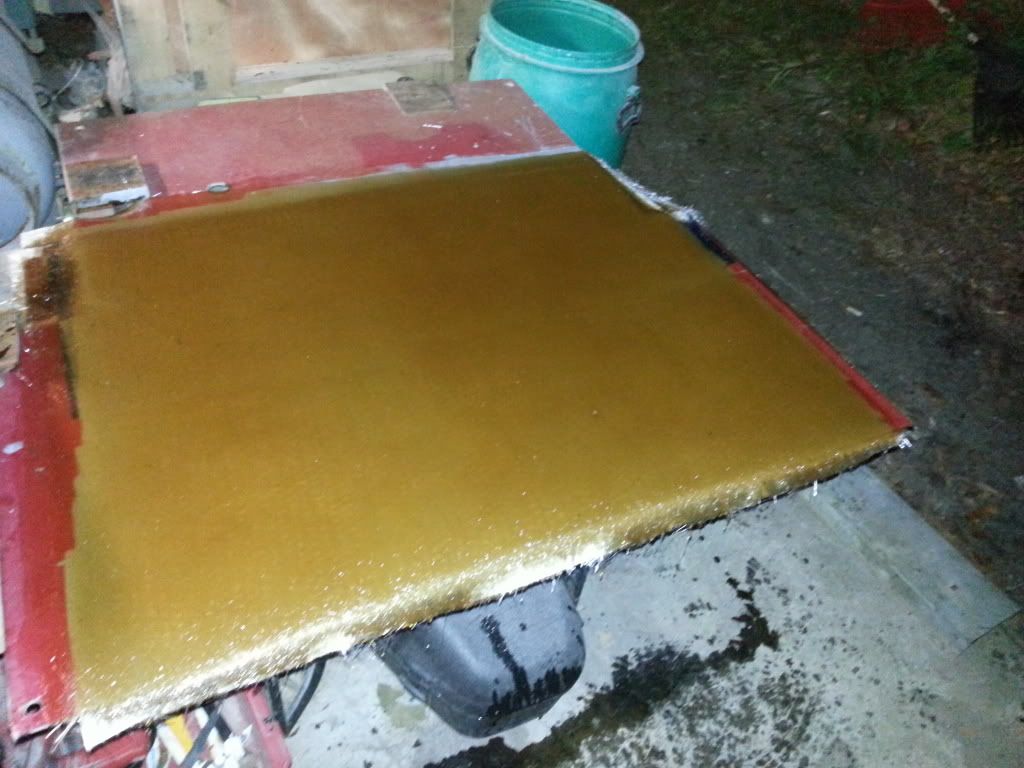 I bedded the wood blocks down in thickened resin... 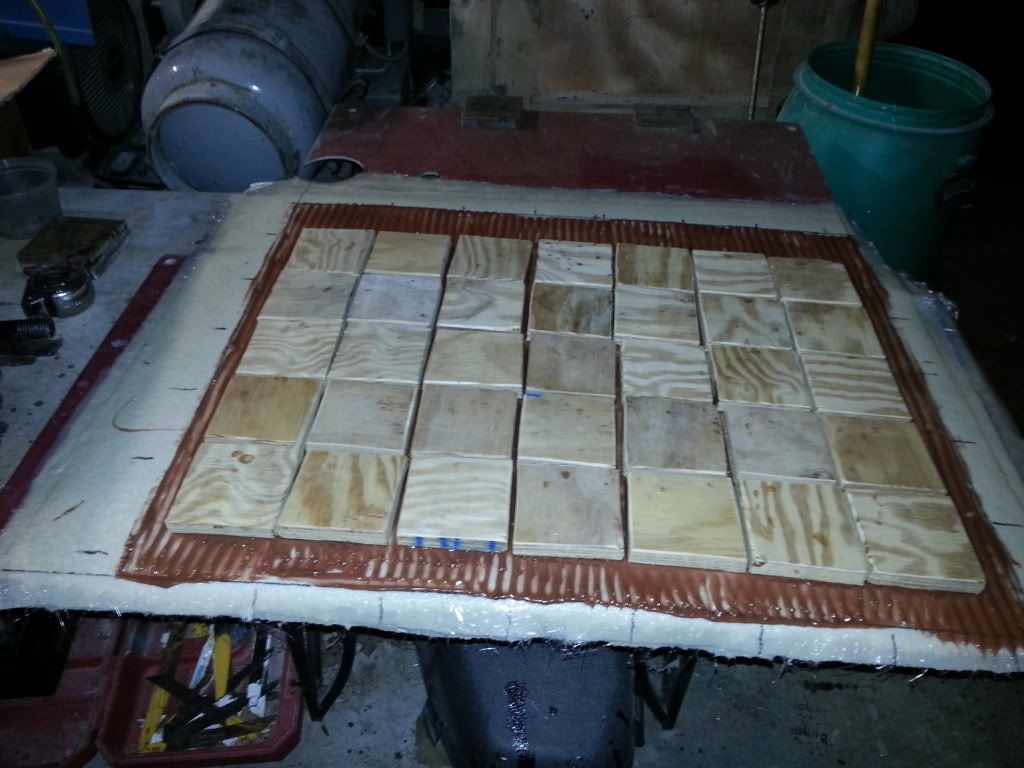 I added resin that was a little thick in between the squares... 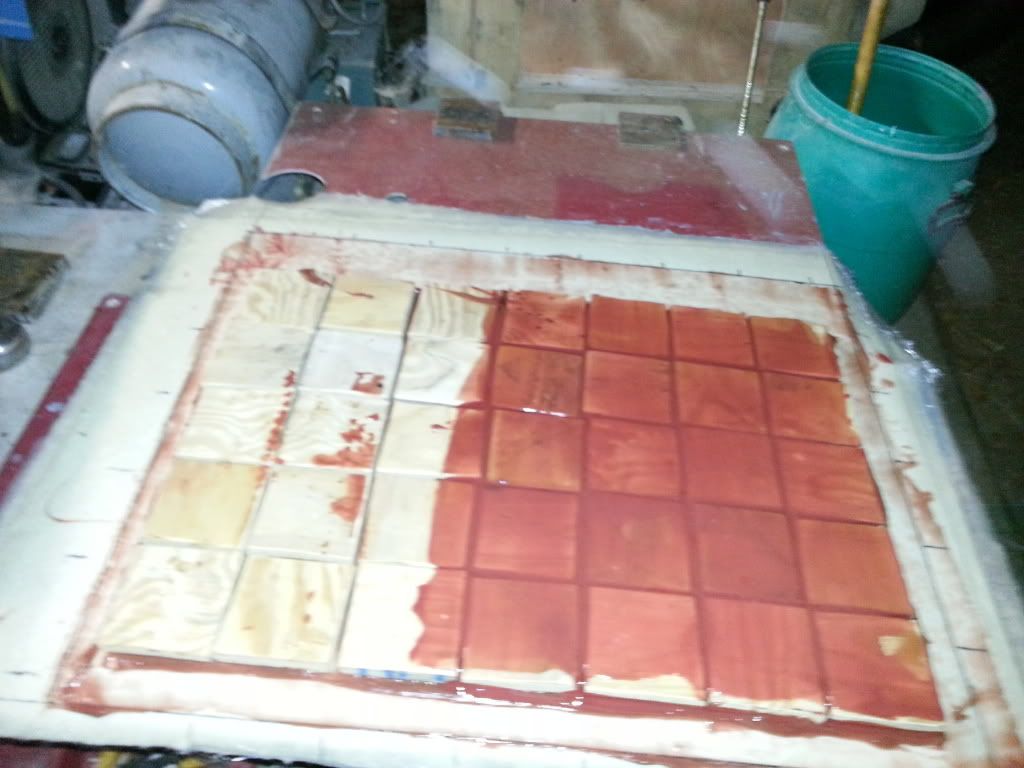 I added several layer of csm over the coring... 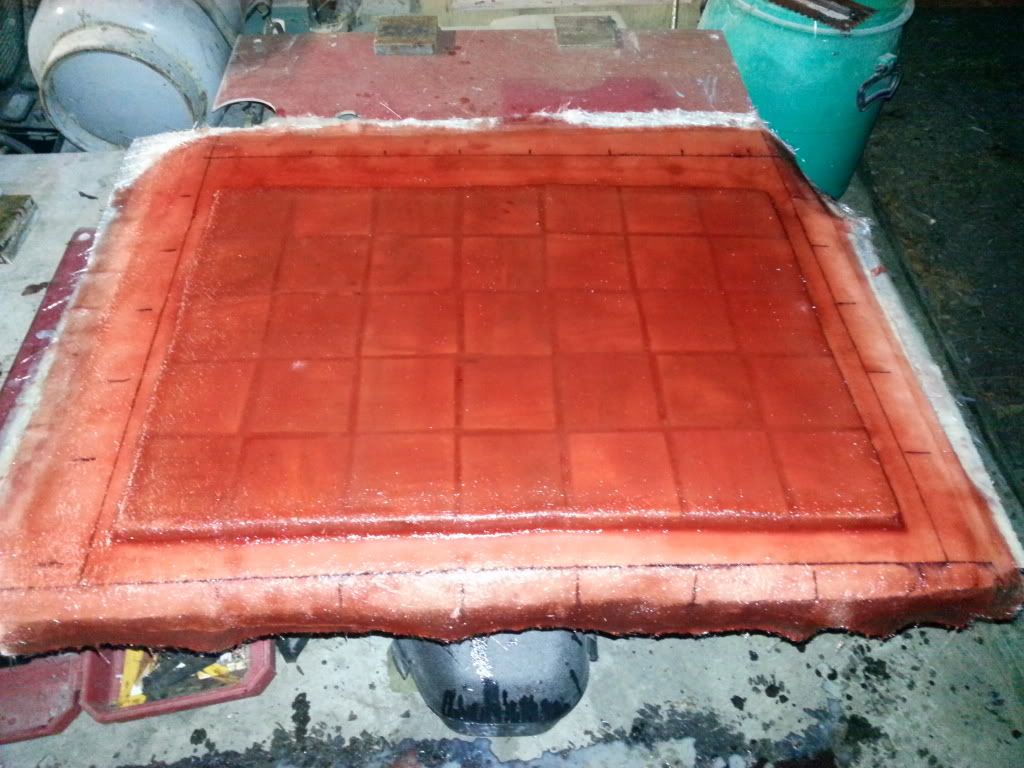 Then added a layer of 1708 then on top of that one more csm layer to build thickness and to sand on so I dont sand into the 1708 fibers... 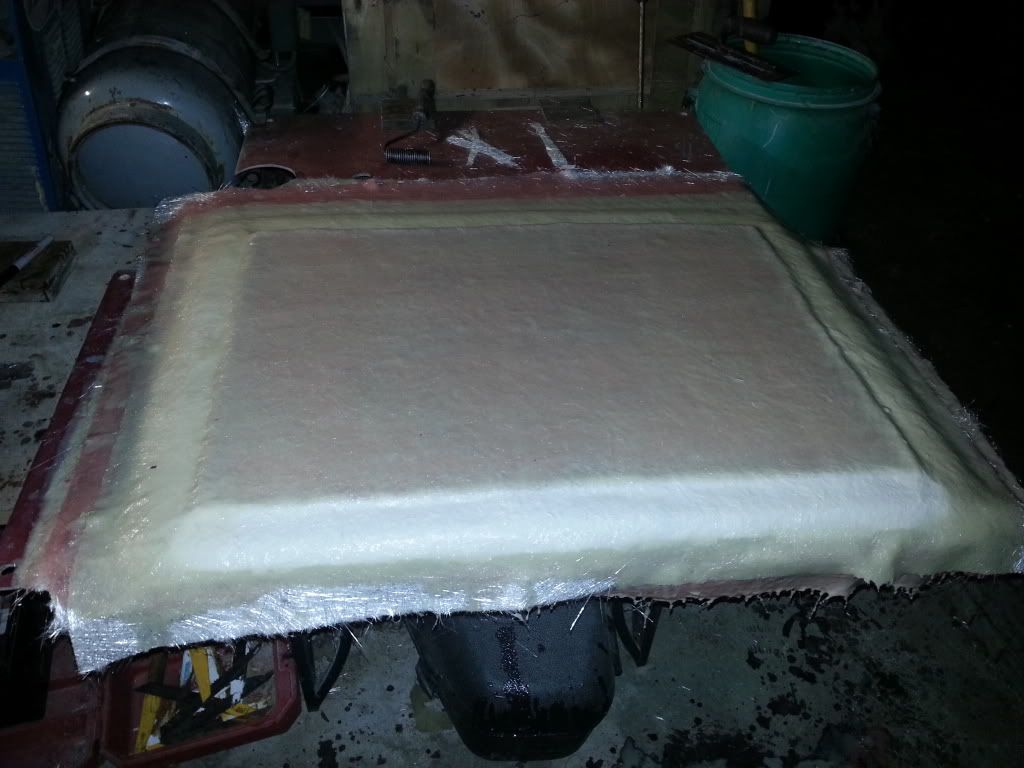 This created a 1" thick lambent that was smooth on the top side for patching a section of decking... 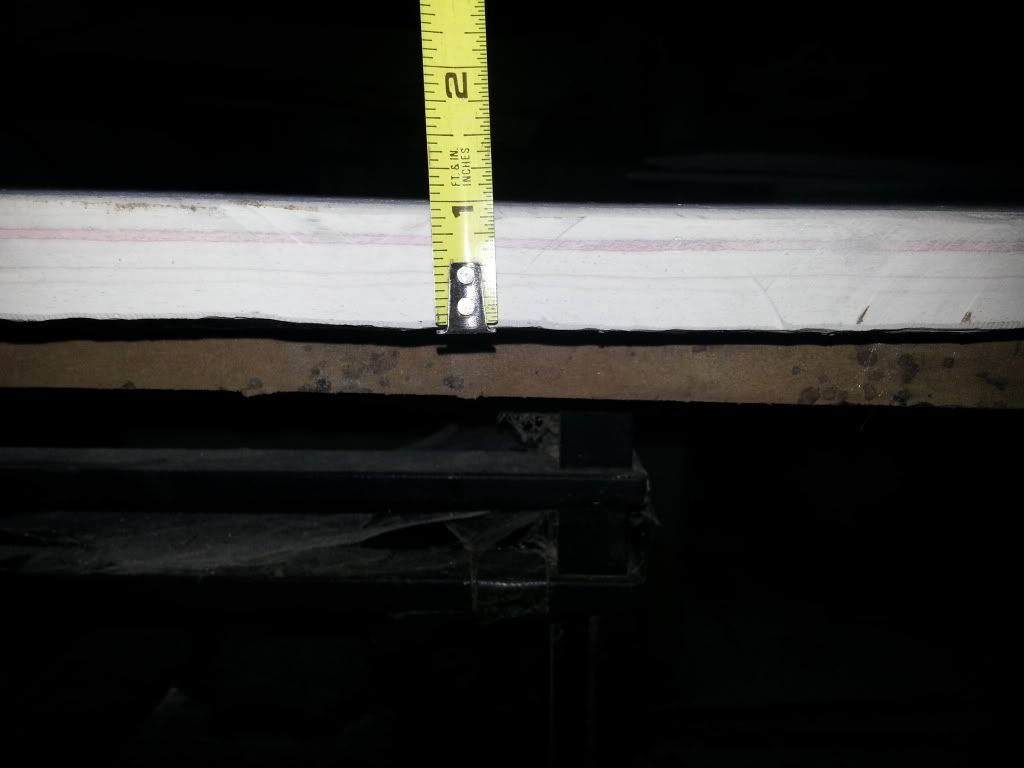
__________________
Current SeaCraft projects: 68 27' SeaCraft Race boat 71 20' SeaCraft CC sf 73 23' SeaCraft CC sf 74 20' SeaCraft Sceptre 74 20' SeaCraft CC sf |
|
#9
|
|||
|
|||
|
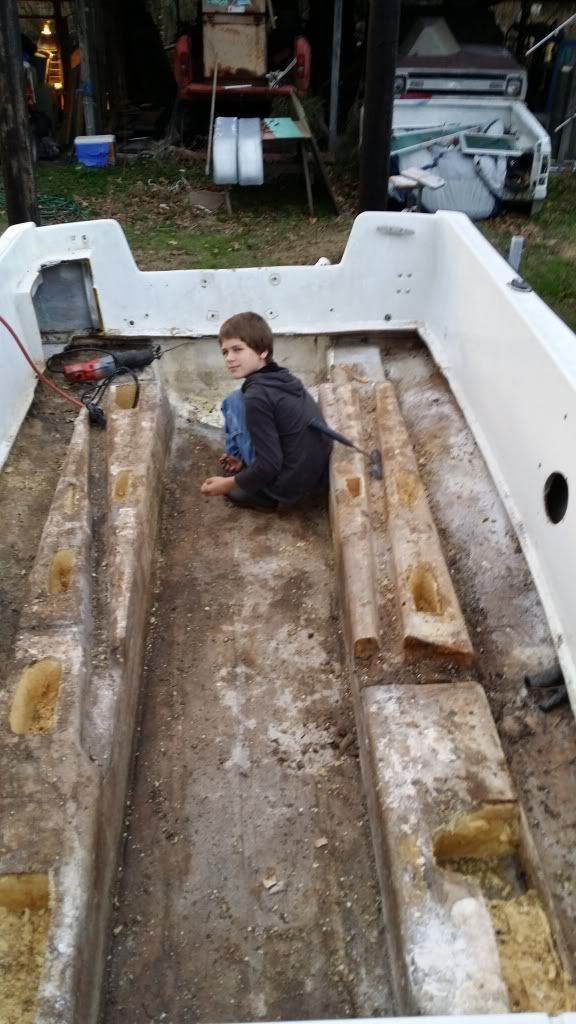
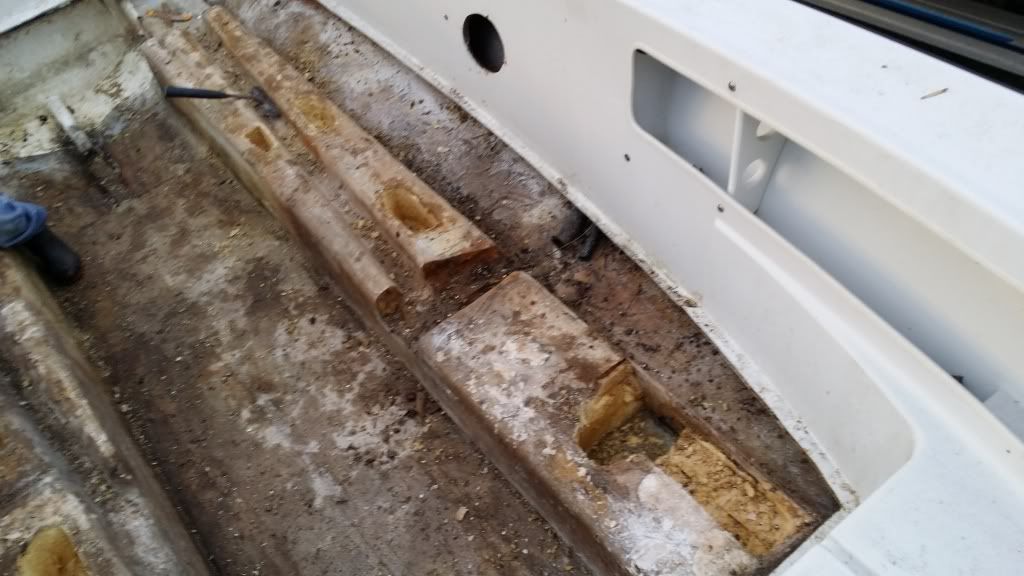
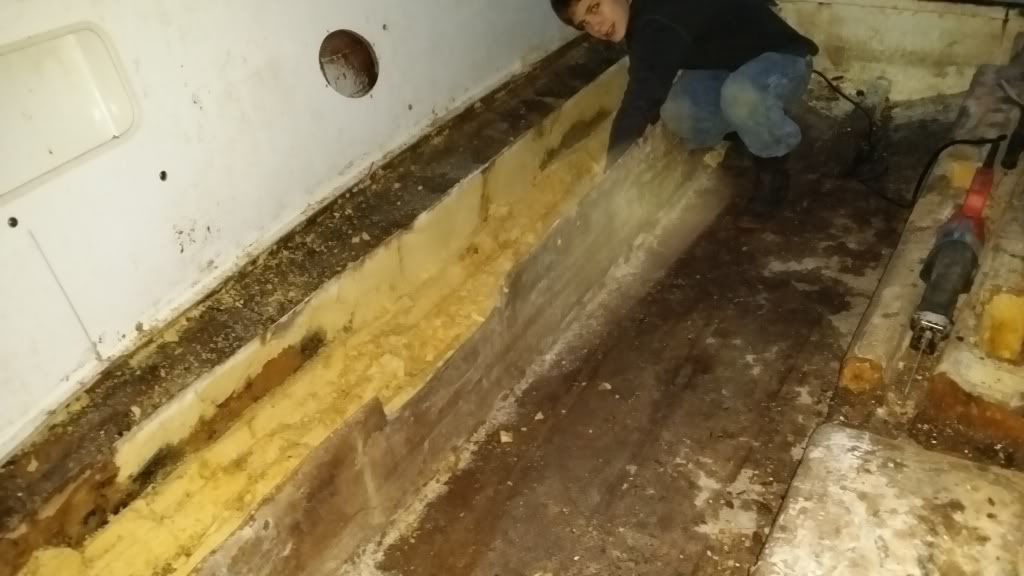
The foam in the top of the stringers was dry but the bottom had a 1" of water in them. Cut the tops off and started getting it out. There was several holes cut in the tops already where they were filled originally. They never sealed them off after pouring the foam and that's how most of the water got in.
__________________
Current SeaCraft projects: 68 27' SeaCraft Race boat 71 20' SeaCraft CC sf 73 23' SeaCraft CC sf 74 20' SeaCraft Sceptre 74 20' SeaCraft CC sf |
|
#10
|
|||
|
|||
|
Back to it, finally got some good weather and time to get back on the cc. Cleaned out the stringer boxes and formed them up for foam. Will be raising the floor 2.5 inches and filling them higher for that purpose. Poured 2 part foam let it set then removed forms. Trimmed the top level and beveled the edges. Ready for glass.
__________________
Current SeaCraft projects: 68 27' SeaCraft Race boat 71 20' SeaCraft CC sf 73 23' SeaCraft CC sf 74 20' SeaCraft Sceptre 74 20' SeaCraft CC sf |
 |
|
|